Building / Configuring the Lambda into AWS
- Part 1: Creating a good old Hello World AWS C# Lambda
- Part 2: Building / Configuring the Lambda into AWS
- Part 3: Saving / Retrieving data using Marten
- Part 4: Building / Configuring using AWS Tools
- Part 5: Configuring the VPC so we can call the database
Now after part 1, we should have a basic lambda ready to build and deploy. Because this is such a basic handler, this will be published using the dotnet sdk, but if you have dependencies it's best to use the AWS Tools which I will show in part 4.
Publishing the project
Publishing is easy! All we need to do is run publish
phill@DESKTOP-599M841 D:\CSharpLambdaSample\HelloWorldLambda
$ dotnet publish
Microsoft (R) Build Engine version 15.1.548.43366
Copyright (C) Microsoft Corporation. All rights reserved.

  HelloWorldLambda -> D:\CSharpLambdaSample\HelloWorldLambda\bin\Debug\netcoreapp1.0\HelloWorldLambda.dll
We can change the output directory by an -o argument, and change from debug to release passing in a -c argument.
phill@DESKTOP-599M841 D:\CSharpLambdaSample\HelloWorldLambda
$ dotnet publish -o ./../published/ -c Release
Microsoft (R) Build Engine version 15.1.548.43366
Copyright (C) Microsoft Corporation. All rights reserved.

  HelloWorldLambda -> D:\CSharpLambdaSample\HelloWorldLambda\bin\Release\netcoreapp1.0\HelloWorldLambda.dll
Even tho the output is... in another folder, it does actually publish to the specified folder...
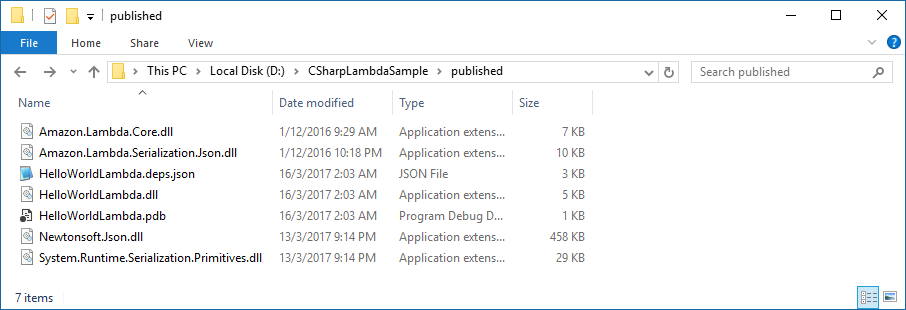
Now we can zip the contents of the directory. Don't zip the directory itself! You only want to zip the contents of the directory so that the .dll is in the root of the zip file.
The name of the zip can be anything you want, you can version the zip during build process, or how ever you desire.
Configuring the Lambda
Next we can configure and upload the Lambda. You can do it via the AWS Tools, CLI, SDK's... However I'm only going to show how it's done using the AWS Console.
From the Lambda Dashboard, click Create a Lambda Function

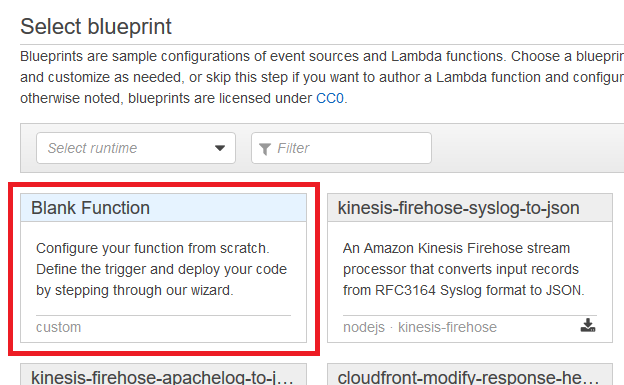
Next click on Blank Function
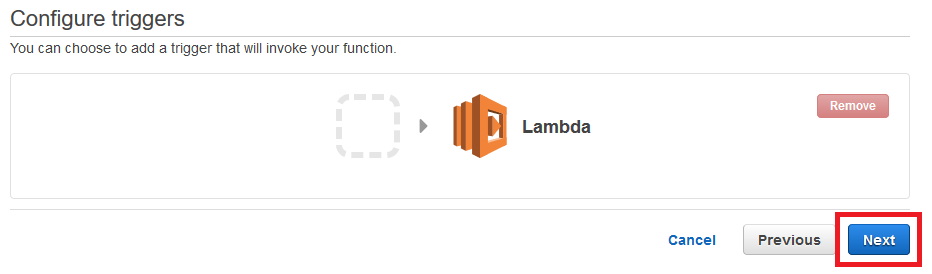
Click on Next from the Configure Trigger. We don't need a trigger at this point, that's another topic. It allows you to create the Lambda as a cron job, or trigger from a notification, etc. We just want to test awesome C#iness.
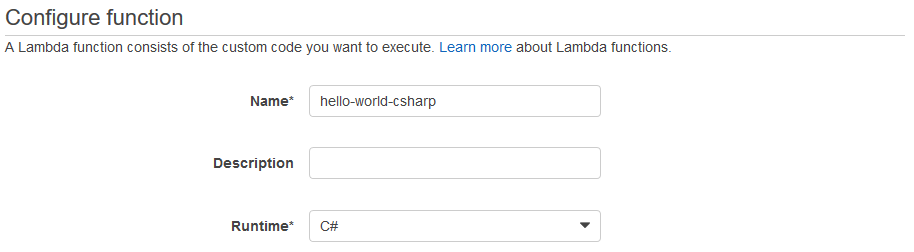
Now we can configure the Lambda itself.
Give it a name, I called this hello-world-csharp, set the runtime to C#
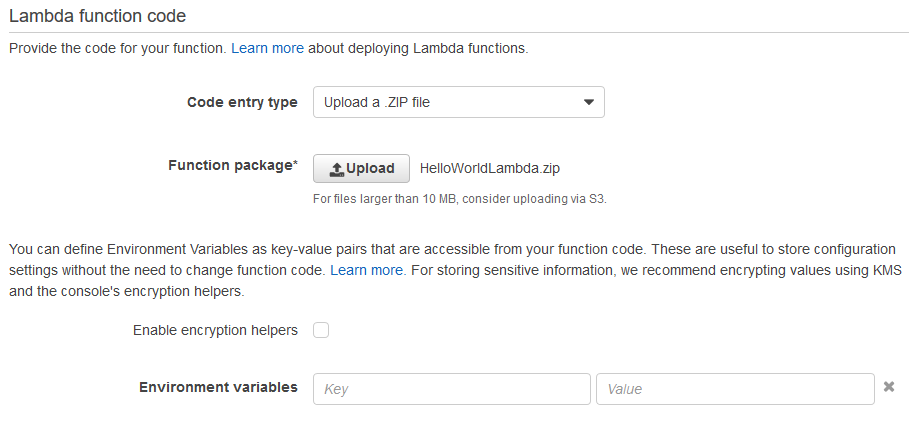
Next you need to upload the package, so select the zip file we made earlier.
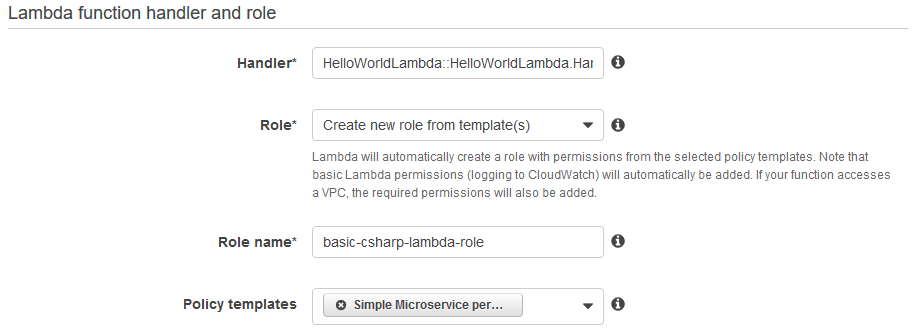
Lastly we need to configure the Handler and Role.
The handler is important, it has a defined structure to it.
Handler:
Handler is split into 3 parts, separated by ::
ASSEMBLY :: NAMESPACE :: METHOD
So we have:
- Assembly =
HelloWorldLambda - Namespace =
HelloWorldLambda.Handler - Method =
Handle
So our Handler should be configured like:
HelloWorldLambda::HelloWorldLambda.Handler::Handle
Role:
If you've never used an AWS Lambda's before, you need to give it permissions. So select Create new role from templates(s)
Add a new name, like basic-csharp-lambda-role
And for Policy templates, just select Simple Microservice permissions
Finally, hit Next and verify the new function, and press Create function
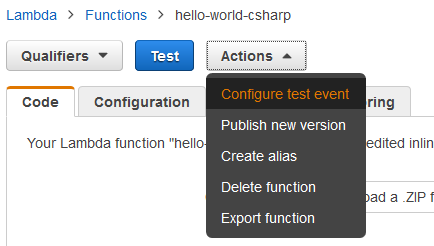
Testing the Lambda
Now that we have created the lambda, it's ready to test!!!! The fun part, finally.
Click on Actions and select Configure test event
We don't need to use a template, so let's just modify the Hello World example. Change the default:
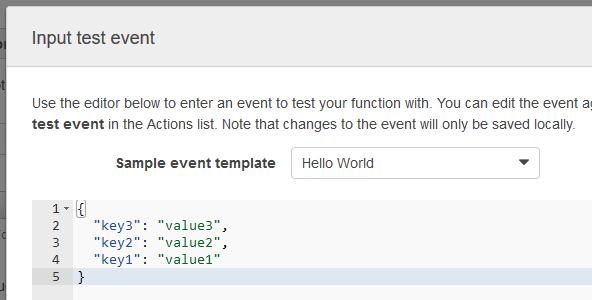
To have some test data that matches our Request model, so just add a single property called name with a value.
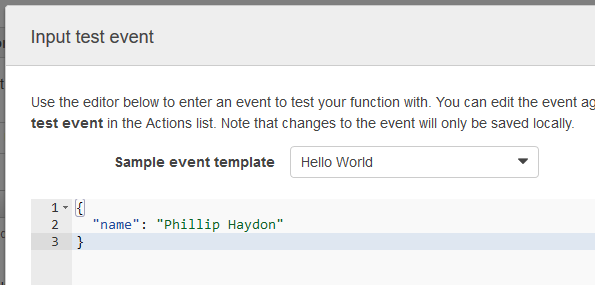
Now you can hit Save and test
You should get a loading screen with...
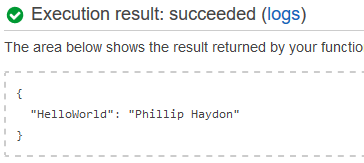
BOOM! We have created an AWS C# Lambda in VSCode, published it and deployed it to AWS Lambda, configured it, and tested it.
Next up we will do something a little more fancy and query the database!
comments powered by Disqus