Setting up Ubuntu and nginx on Azure
- Part 1 - Setting up the Virtual Machine and nginx
- Part 2 - Setting up new Website and Domain on nginx
- Part 3 - Setting up Mono on nginx
- Part 4 - Setting up a NancyFX website
- Part 5 - Setting up a ServiceStack web service
Note: I'm breaking this up into 5 parts because otherwise it gets far too long :(
So after spending a week with OSX, I thought I would see how well I go with setting up Mono on Ubuntu... on Azure.
Turns out it's actually rather simple!
Setting up the Virtual Machine
Setting up the virtual machine is pretty straight forward. From the Azure Portal, click the Virtual Machines tab, and select New.
I create mine from the gallery rather than the quick option.
Select Ubuntu Server 13.04 from the options, give your new server a name. For Authentication I recommend making a password rather than uploading an SSH key. Only because if you're new or trying this out just to play around, that stuff is probably too difficult for now :)
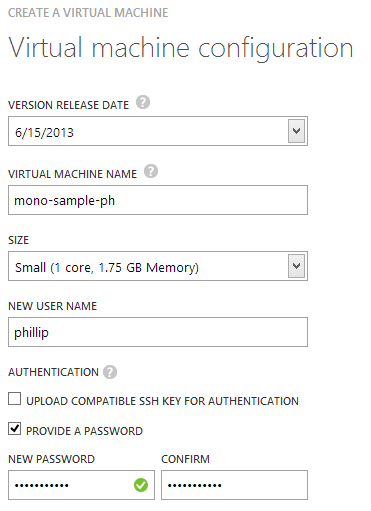
Click next (the little arrow thing) and setup as a Stand-Alone Virtual Machine. Name it and select a region, Next, and bam you're done.

Once the provisioning is complete, you need to click on the Virtual Machine, and select Endpoints.
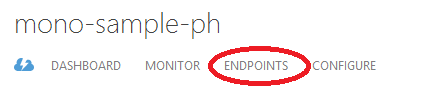
Create a new endpoint for port 80.
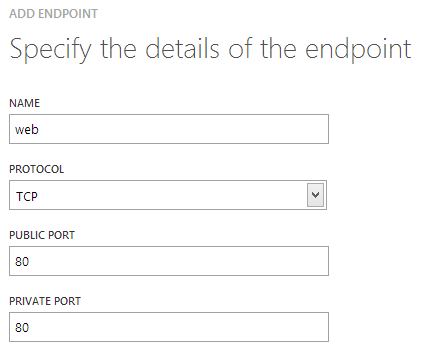
This is so the websites are publicly accessible.
Logging into Ubuntu!
Unlike Windows Server, there's no desktop for us to RDP into, we could add it, but we wont... There's no need to :)
First things first, we need to download PuTTY. So head on over to http://www.putty.org and download PuTTY.

When you've downloaded it, run it up, and... switch back to the Azure Portal, to the Dashboard. On the quick glance section on the right hand side. Find the SSH DETAILS piece.
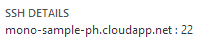
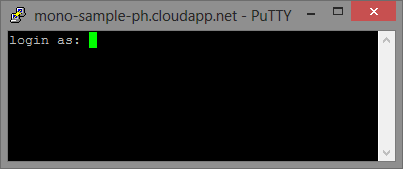
Enter the address into the PuTTY details:

And select option. You should get a console type window now that looks like.
Login using the details you created when creating the Virtual Machine, and if successful you should get a wall of text.
login as: phillip phillip@mono-sample-ph.cloudapp.net's password:
The programs included with the Ubuntu system are free software; the exact distribution terms for each program are described in the individual files in /usr/share/doc/*/copyright.
Ubuntu comes with ABSOLUTELY NO WARRANTY, to the extent permitted by applicable law.
Welcome to Ubuntu 13.04 (GNU/Linux 3.8.0-25-generic x86_64)
Documentation: https://help.ubuntu.com/
System information as of Wed Jun 26 14:46:18 UTC 2013
System load: 0.02 Processes: 93 Usage of /: 3.1% of 28.79GB Users logged in: 0 Memory usage: 8% IP address for eth0: 10.78.154.86 Swap usage: 0%
Graph this data and manage this system at https://landscape.canonical.com/
Get cloud support with Ubuntu Advantage Cloud Guest: http://www.ubuntu.com/business/services/cloud
Use Juju to deploy your cloud instances and workloads: https://juju.ubuntu.com/#cloud-raring
0 packages can be updated. 0 updates are security updates.
phillip@mono-sample-ph:~$
Next, type in the command sudo -s, and enter your password again.

This will set the current user to a super user so we don't need to call sudo with every command, which can get a little frustrating after a while.
Setup nginx
Before we setup nginx, run the command apt-get update. This downloads all the package lists from the repositories and updates the information with the newest versions of the packages and their dependencies.
Now, run the command apt-get install nginx.
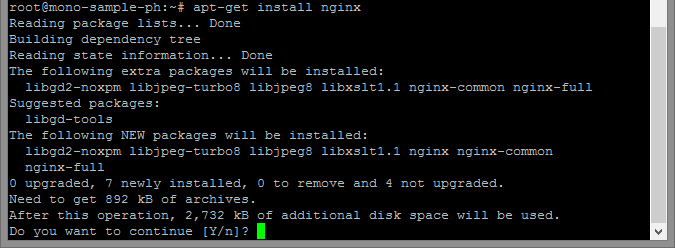
Enter y and hit enter, and it will download the package and install.
Next, run the command service nginx restart, this should say the service is restarting.
root@mono-sample-ph:~# service nginx restart
 * Restarting nginx nginx                                                [ OK ]
Now, run the command ls
root@mono-sample-ph:~# ls
root@mono-sample-ph:~#
If you haven't change the directory then it should be currently empty. So now we can run the command wget http://localhost which will issue a request to the localhost domain and download the HTML file.
You should end up with your command-line looking like:
root@mono-sample-ph:~# wget http://localhost
--2013-06-26 15:07:43--  http://localhost/
Resolving localhost (localhost)... 127.0.0.1
Connecting to localhost (localhost)|127.0.0.1|:80... connected.
HTTP request sent, awaiting response... 200 OK
Length: 612 [text/html]
Saving to: âindex.htmlâ

100%[======================================>] 612         --.-K/s   in 0s

2013-06-26 15:07:43 (56.7 MB/s) - âindex.htmlâ saved [612/612]

root@mono-sample-ph:~# ls
index.html
root@mono-sample-ph:~#
As you can see when running ls again there's now a file called index.html. We can take a quick look at that by running nano index.html
Nano is a text editor that is installed on Ubuntu by default. To exit out of Nano once you're done looking press ctrl + x which will close Nano and return you to the command-line.
For a good beginners guide take a look at The Beginner’s Guide to Nano, the Linux Command-Line Text Editor
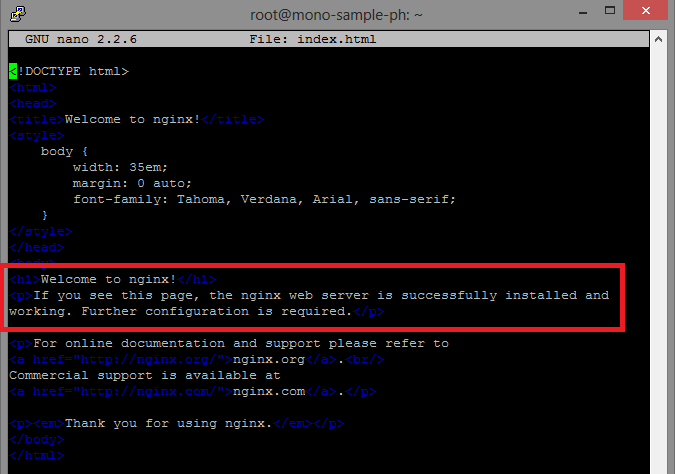
And we can see that nginx is setup and running!
comments powered by Disqus