Semantic-UI & AngularJS - Basic Registration Form with Validation
Last week I saw a tweet about Semantic-UI, which I had not heard about, I guess it's relatively new. I decided to take a look and to be honest. I love what I see.
So to get rolling I decided to create a basic registration form for a personal project using it.
What is Semantic UI
Well, for starters, its a rather large library :| coming in total at a whopping 333kb for just the minified CSS an JavaScript.
That's not including the Fonts (roughly 50kb, unless you like SVG which is 194kb, but who the hell uses that crap), Images which are about 3-10kb, though you probably only use 1 or 2 per app depending on what you're doing. These are all loading gifs, all other images are... well done using Font-Awesome. Which happens to be rolled into the library.
But for what the library does, its pretty damn impressive.
The idea is that Semantic is a more fluent and structured way to writing a web application, rather than naming stuff poorly like Bootstrap does with things like col-lg-4, Semantic opts for column. This is both good and bad. The examples on their homepage are more semantic, but at the cost of either writing less or more code in order to describe the UI elements in the markup.
Reading the examples is awesome, in fact I wanted to right align a button, I started out with:
ui blue submit button
I thought "I want that floated right, it would look better...", and I ended up with
ui blue submit button floated right
You end up writing lots but instead of shifting around in CSS to figure out how to move it from left to right, I just described it. Sure enough, button sat on the right hand side!
Things used in this demo
Nothing is complete without Nancy, but I'm not showing any Nancy stuff. I'm including it in-case I show the server side stuff.
Setup
Download the latest version of Semantic from the website and include the packages folder into your project.
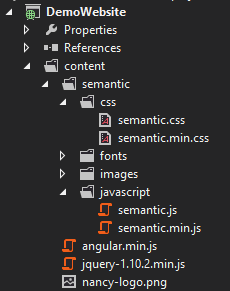
And include them into your page...
<!doctype html>
<html lang="en">
<head>
  <meta charset="utf-8">
  <title>DemoWebsite</title>

  <link href="/content/semantic/css/semantic.min.css" rel="stylesheet" type="text/css"/>
</head>
<body>

  <script src="/content/jquery-1.10.2.min.js"></script>
  <script src="/content/semantic/javascript/semantic.min.js"></script>
  <script src="/content/angular.min.js"></script>

</body>
</html>
If we run this, we should get a nice blank page :)
Creating the form
Lets start by writing some HTML for the form:
<div class="container">
  <h1>Register Now</h1>

  <div class="ui form segment">
    <div class="two fields">
      <div class="field">
        <label for="GivenName">Given Name</label>
        <input id="GivenName" placeholder="Given Name" type="text" />
      </div>

      <div class="field">
        <label for="Surname">Surname</label>
        <input id="Surname" placeholder="Surname" type="text">
      </div>
    </div>

    <div class="field">
      <label for="Email">Email</label>
      <input id="Email" placeholder="Email" type="text">
    </div>

    <div class="field">
      <label for="Username">Username</label>
      <input id="Username" placeholder="Username" type="text">
    </div>

    <div class="field">
      <label for="Password">Password</label>
      <input id="Password" type="password">
    </div>

    <div class="field">
      <label for="PasswordConfirm">Password Confirm</label>
      <input id="PasswordConfirm" type="password">
    </div>

    <button class="ui blue button">Submit</button>
  </div>
</div>
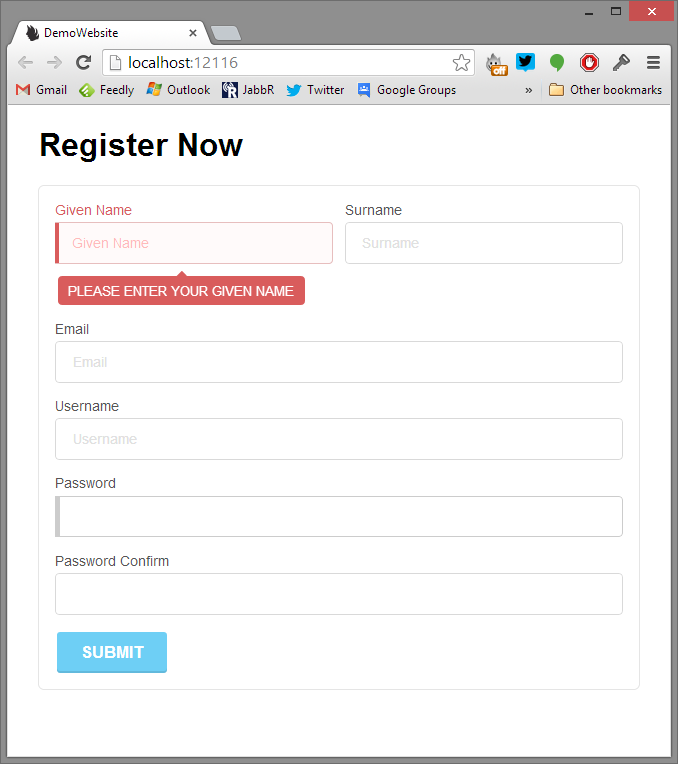
Nothing special, this is using the Semantic markup. The outer container div is just a element I added to center the page. Without adding anything to the styling to change the look and feel, we get a page that looks like this:

Doesn't look too bad.
Lets add some validation
Based on the documentation you can add validation in HTML, but I prefer to do it in JavaScript, so that's how I'll do it now :)
First we need to find the form element, then call .form(*validation*, *options*) on it to wire it up.
<script>

  (function ($) {
    $('.ui.form').form({
      givenName: {
        identifier: 'GivenName',
        rules: [{
          type: 'empty',
          prompt: 'Please enter your given name'
        }]
      },
      surname: {
        identifier: 'Surname',
        rules: [{
          type: 'empty',
          prompt: 'Please enter your surname'
        }]
      },
      username: {
        identifier: 'Username',
        rules: [{
          type: 'empty',
          prompt: 'Please enter a username'
        }]
      },
      email: {
        identifier: 'Email',
        rules: [{
          type: 'empty',
          prompt: 'Please enter your email'
        },{
          type: 'email',
          prompt: 'Please enter a valid email'
        }]
      },
      password: {
        identifier: 'Password',
        rules: [{
          type: 'empty',
          prompt: 'Please enter a password'
        },{
          type: 'length[6]',
          prompt: 'Password needs to be atleast 6 characters long'
        }]
      },
      passwordConfirm: {
        identifier: 'PasswordConfirm',
        rules: [{
          type: 'match[Password]',
          prompt: 'Password don\'t match'
        }]
      }
    }, {
      on: 'blur',
      inline: 'true'
    });
  }(jQuery));

</script>
Let's break this up, first we have an array of validation rules.
email: {
  identifier: 'Email',
  rules: [{
    type: 'empty',
    prompt: 'Please enter your email'
  },{
    type: 'email',
    prompt: 'Please enter a valid email'
  }]
}
The first part email is the identifier in Semantic.
The next bit of the identifier, this can match against either id name or data-validate attributes on the element. I picked the id since I'm using for on my labels.
Next bit of the rules, which is an array of objects defining the type of validation, and the message to prompt the user with. This is somewhat the same as using jQuery Validate (except it works...)
The second part is the settings:
{
  on: 'blur',
  inline: 'true'
}
This part says we want validation to occur on blur, and we want it to be inline.
This gives us the following effect.
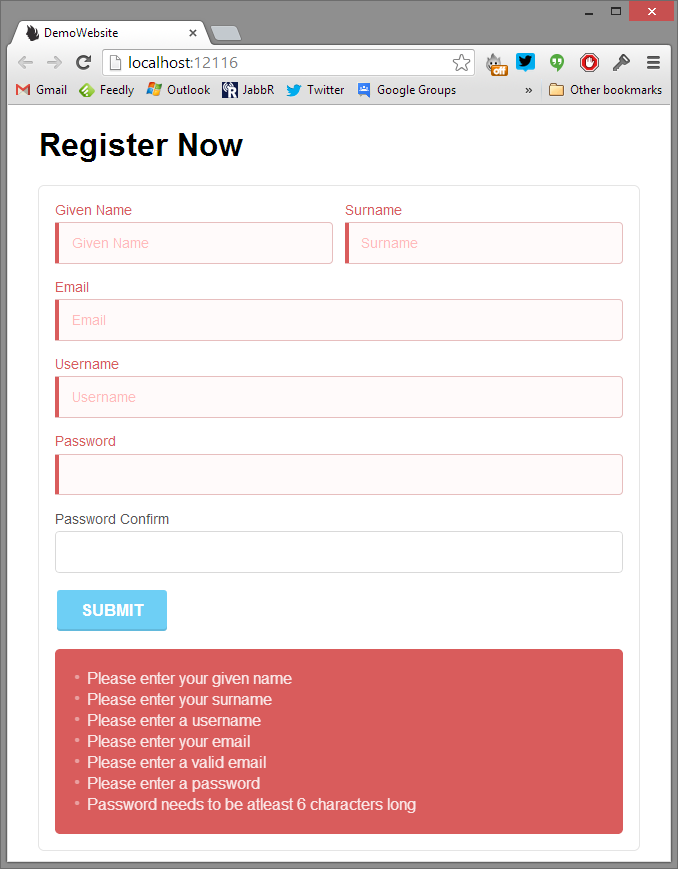
If we wanted to put all errors in a list at the bottom by adding <div class="ui error message"></div> to the bottom (or top) of the form.
This would give us something like:
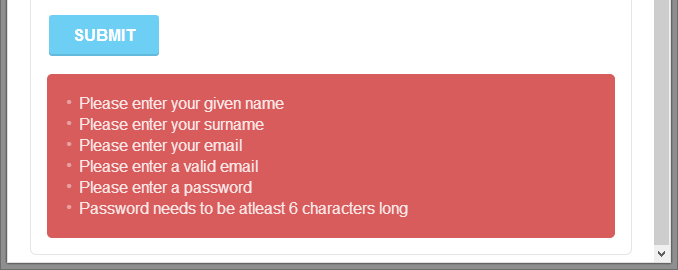
Though the form will only display the messages at the bottom if you manually validate the form, or press submit. We haven't defined our button as a submit button, which I'll explain soon.
Let's create a Controller and get this validated!
So assuming you've setup your Angular App...
<html lang="en" ng-app>
And set the controller...
<div class="ui form segment" ng-controller="RegisterController">
We can now create our RegisterController
function RegisterController($scope) {
  $scope.register = function() {
    alert("Register was clicked!");
  };
}
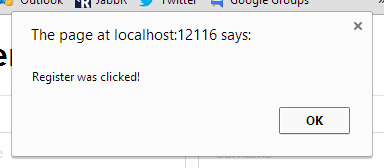
Nice and simple. Wire up an Angular click event to the button...
<button class="ui blue button" ng-click="register()">Submit</button>
Notice how the button doesn't define submit class. If you put the submit, Semantic will try and handle submission. We don't want that.
Now if we click the button we should get a prompt:
Next we want to check the form is valid. In the controller we can add a basic function to invoke validate on the Semantic form.
function RegisterController($scope, $element) {
  var registrationForm = $($element);

  $scope.isInvalid = function() {
    return !registrationForm.form('validate form');
  };

  $scope.register = function () {
    if (this.isInvalid()) {
      return;
    }

    alert("Register was clicked!");
  };
}
So we inject the $element into the Controller, this gives us the current scope element the controller is attached to. Since we attached it to the form the scope for the form in Semantic and Angular is the same.
This is a Angular object though, so we need to then convert it to a jQuery.
Now we can implement the isInvalid method which will call form, a jQuery plugin implemented by Semantic, and pass in the argument validate form which tells it to... well validate the form.
The result is true or false, and the UI will now show an invalid state.
Now we've got validation working! Woohoo!
Next we need some data, so lets create an empty property on our scope to work with, this will be our model called user
function RegisterController($scope, $element) {
  var registrationForm = $($element);

  $scope.user = {};

  $scope.isInvalid = function() {
    return !registrationForm.form('validate form');
  };

  $scope.register = function () {
    if (this.isInvalid()) {
      return;
    }

    console.log(this.user);
  };
}
Next, lets update all the input fields to define the model we want to use:
<input id="GivenName" placeholder="Given Name" type="text" ng-model="user.givenname">
...
ng-model="user.surname"
ng-model="user.email"
ng-model="user.username"
You get the idea.
Back to our form, we fill it in, hit submit...
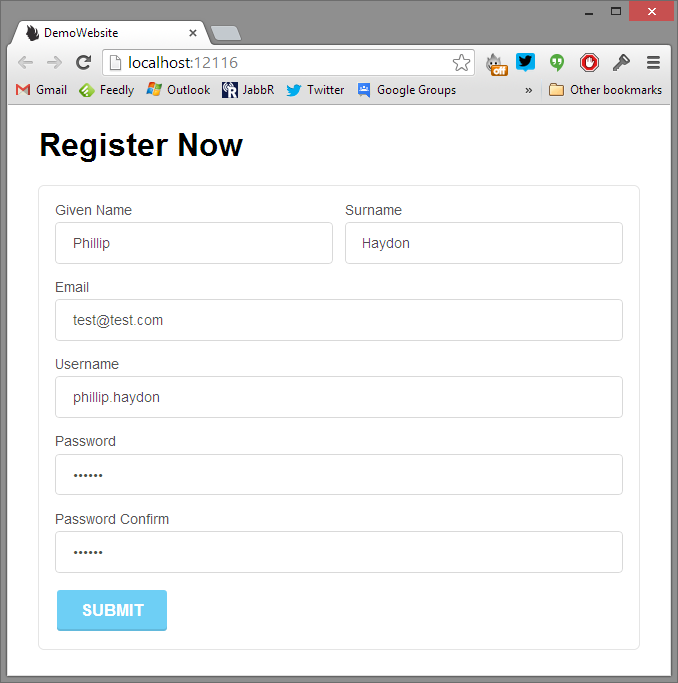
Nothing has happened, the form is valid, but we logged the user to the console, did we get anything?
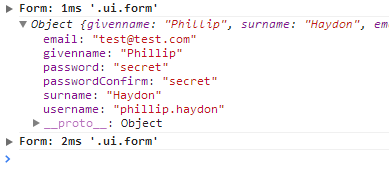
We sure did!
Lets tidy up the form a little
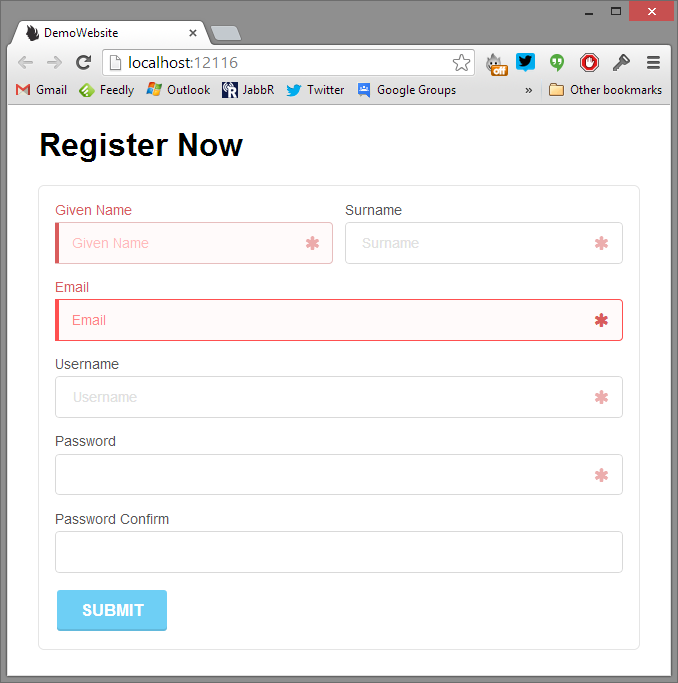
So we want to make the input fields show they are required, at the moment there's no visual indication.
Semantic allows us to put little icons in the corner, its super awesome and super simple.
We will update our input elements like so.
<div class="ui icon input">
  <input id="GivenName" placeholder="Given Name" type="text" ng-model="user.givenname">
  <i class="asterisk red icon"></i>
</div>
Now we get some nice little asterisk's on each input.
What about when we submit the form? We want to block the form UI until we are done. So we can add a loading to the form.
<div class="ui inverted dimmer" ng-class="{true: 'active', false: 'disabled'}[loading]">
  <div class="ui text loader">Registering you now :)</div>
</div>
At the top of the form, we add a new div with the classes for a loader.
We include the ng-class attribute so we can easily toggle the loading. Basically if the value [loading] is true, it will set the active class to the element, when false, it will set it to disabled
Now in our controller we can add.
$scope.loading = false;
And in our click event we can set it to true after before we submit everything, but after we verify its valid.
$scope.register = function () {
  if (this.isInvalid()) {
    return;
  }

  this.loading = true;

  console.log(this.user);
};
Normally you would set it to false again, but I've left it as true to show the affect
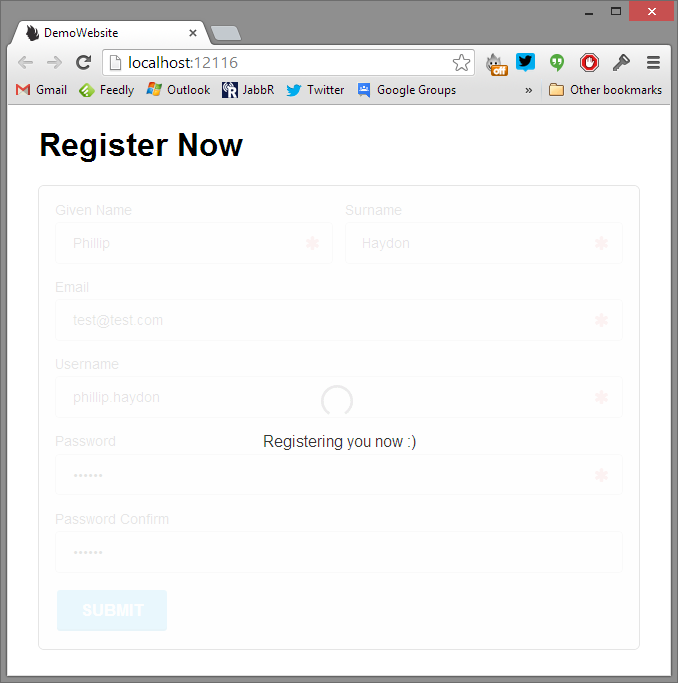
And there we have it.
We built:
- Basic registration form
- Added basic validation
- Added some fancy mandatory icons
- Captured the click event with Angular
- Validated using Semantic
- Added a loading indicator blocking the form
Conclusion
This was the first thing I did putting the two together. I've messed around with Angular quite a bit, first time touching Semantic.
It took me about 7-10 minutes to write the demo, and 2 hours to break it apart and write the blog post piece by piece.
Hopefully people find it useful.
I've put the project on Github if you're interested in taking a look. There isn't much :)
I love Semantic, and Angular... So so awesome :)
comments powered by Disqus